Starting with Arduino IDE
The Arduino platform is based on the Atmel AVR microcontroller family, and the Arduino Uno is based on the ATmega328 microcontroller. The Arduino Integrated Development Environment (IDE) is a software application that provides a way to write and upload code to the microcontroller. The Arduino IDE is available for Windows, macOS, and Linux, and it is open source.
Happy programming!
Board setup
- Connect the Arduino Uno to PC with proper USB cable.
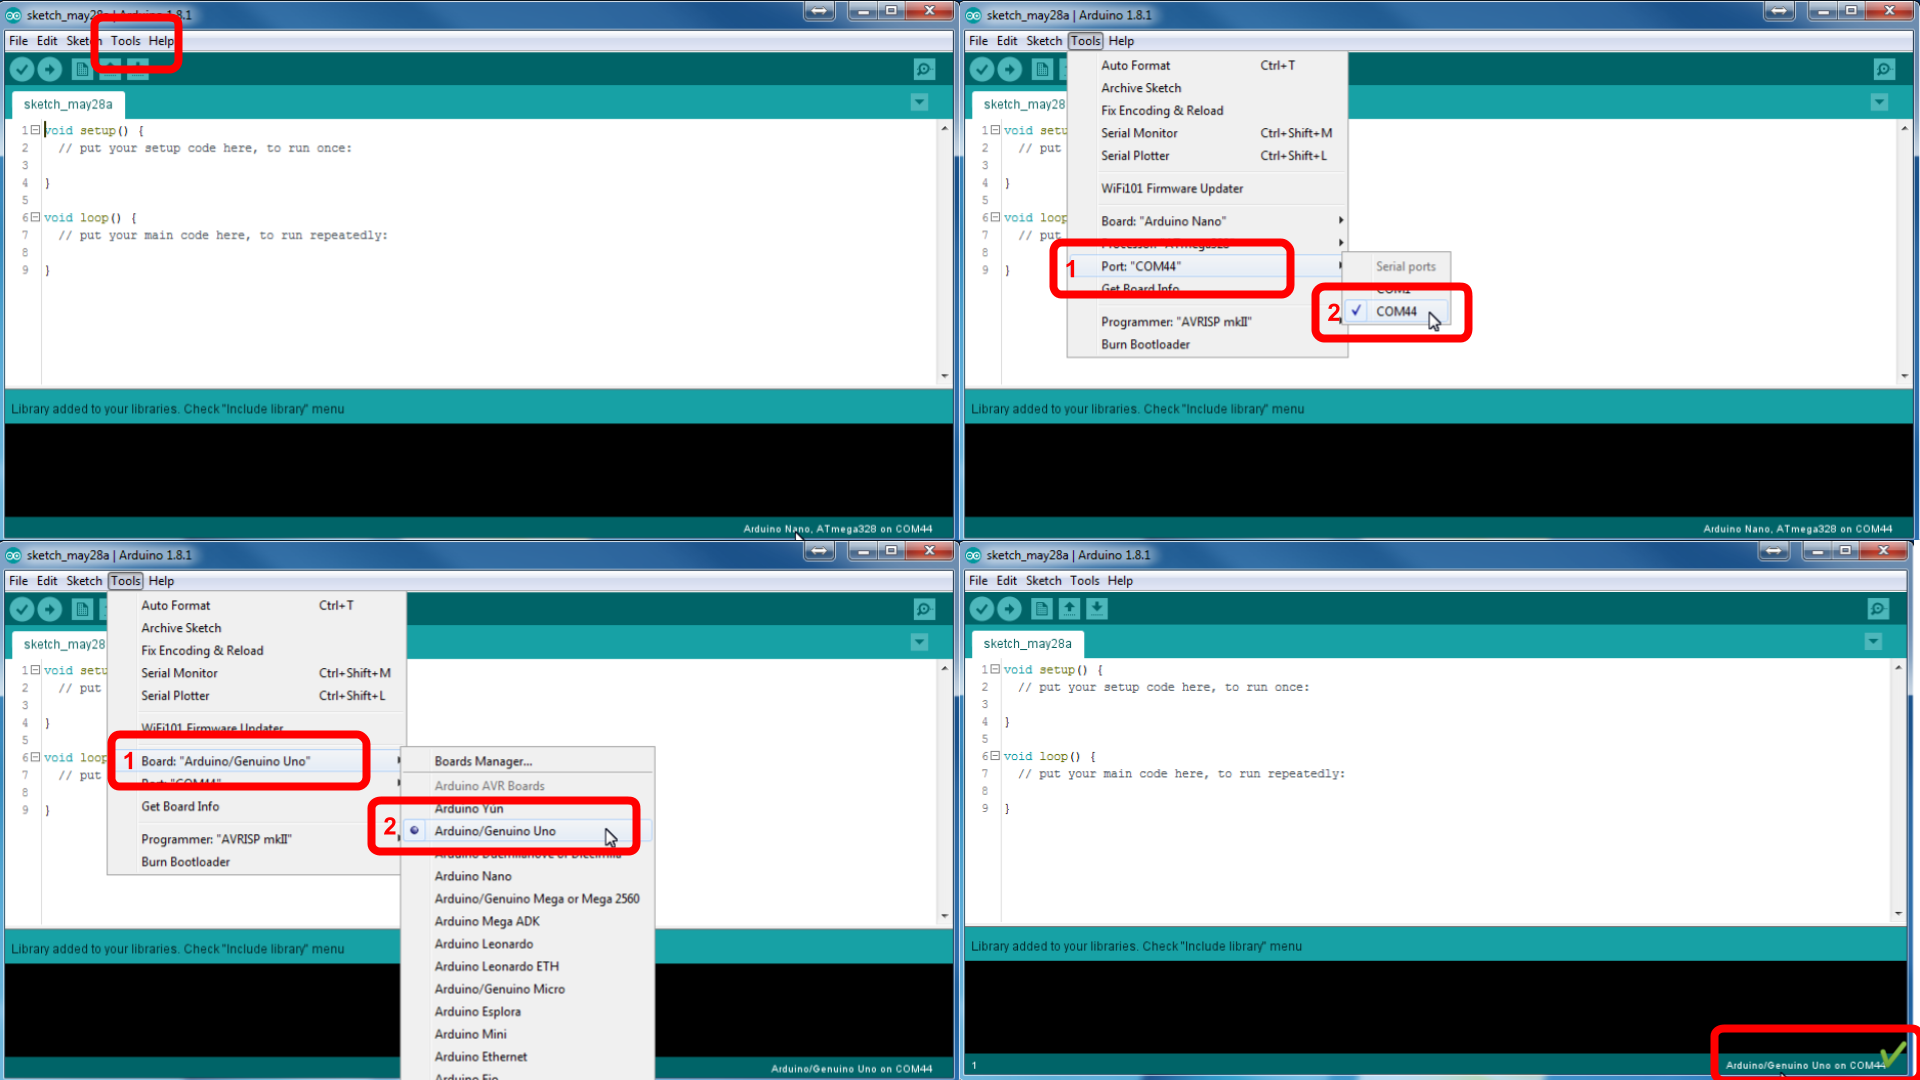
[Arduino Uno] - Make shure that you will set the proper settings (see [@fig:Arduino_basic_setup_IDE]). From the menu choose:
Tools-Board:Arduino/Genuino UnoPort:COM3
 {#fig:Arduino_basic_setup_IDE}
 - Open Arduino IDE program and open program with:
Files - Examples - 01. Basics - Blink.ino - To upload the code you can click the icon
Upload.
If the uploading was successful you will be prompted with the text like:
Done uploading.
Sketch uses 970 bytes (3%) of program storage space. Maximum
is 32256 bytes. Global variables use 9 bytes (0%) of dynamic
memory, leaving 2039 bytes for local variables. Maximum is
2048 bytes.
Issues
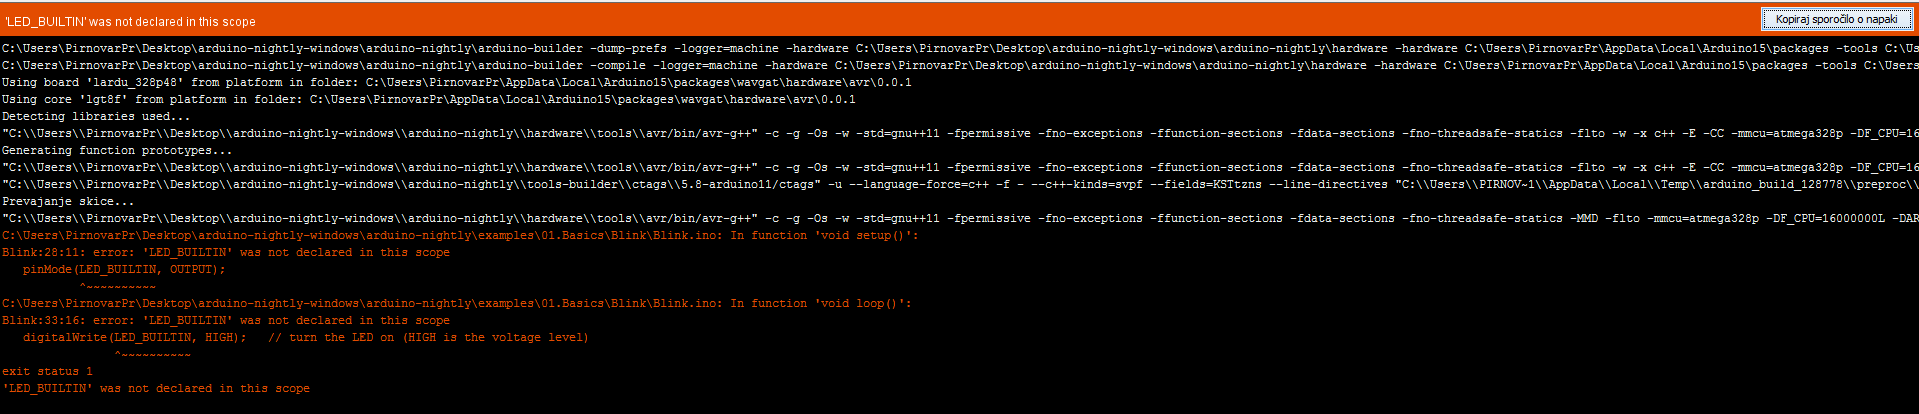
LED_BUILTIN was not declared in this scope
 {#fig:VAR_was_not_declared_IDE}
Compiler ne ve kaj naj bi bilo “LED_BUILTIN” … na tem mesu naj bi bila številka priključka, ki ga želimo krmiliti. V tem primeru je to številka 13. Rešitvi sta lahko 2:
- vse LED_BUILTIN zamenjaš s 13 ali
- v vrstico pred “void setup()” dodaj
const int LED_BUILTIN = 13;
Zadnja (druga) rešitev je boljša, ker pripomore k berljivosti programa… Spremenljivka LED_BUILTIN se imenuje “razlagalna spremenljivka” ker pomaga razlagati program. Tako postane tisti komentar “// turn the LED on (HIGH is the voltage level)” nepotreben, saj sama koda pove točno enako.